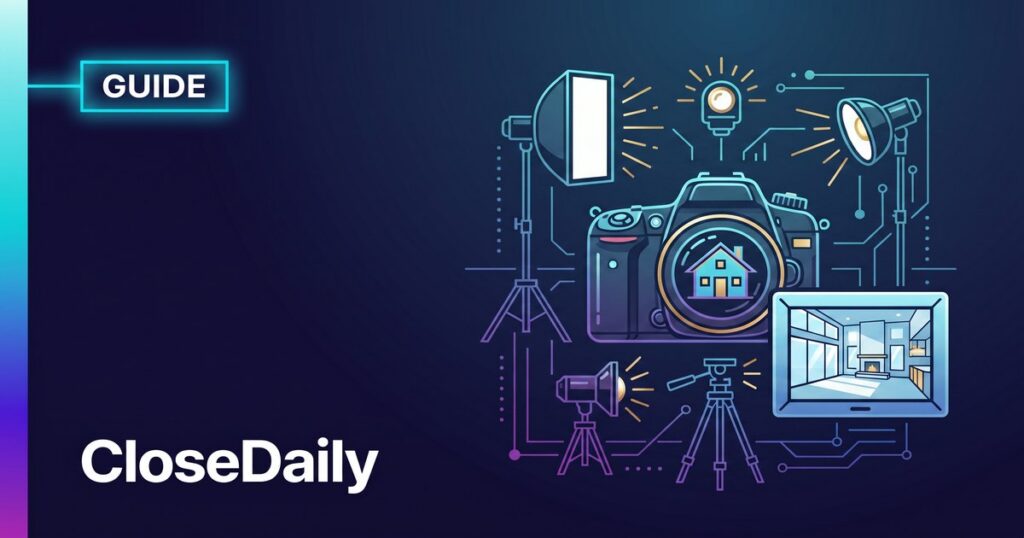
Real Estate Photography Tips: How to Shoot Listings That Sell Faster
Listing Photos Are Your Most Important Marketing Asset
Here’s a number that should shape how you think about listing photography: according to the National Association of Realtors, 97% of homebuyers use the internet in their home search, and the first thing they look at isn’t the price, the square footage, or the description — it’s the photos. Listings with professional photography sell 32% faster and for up to 47% more than those with amateur photos, according to studies by Redfin and VHT Studios.
Your listing photos are the first impression. They determine whether a buyer clicks on your listing or scrolls past it. They determine whether an out-of-town buyer schedules a showing or moves on. They determine whether your seller’s home sits on the market for 60 days or goes under contract in a weekend. And yet, a surprising number of agents still upload dark, blurry, poorly composed photos that actively hurt their listings.
This guide covers everything you need to know about real estate photography — whether you’re shooting listings yourself with a smartphone, managing a professional photographer, or deciding which approach makes sense for your business. The goal is simple: every listing you represent should have photos that make buyers want to see the home in person.
Smartphone vs. DSLR vs. Professional: Making the Right Choice
The first decision is who’s going to shoot the photos and with what equipment. There’s no single right answer — it depends on the listing price, your market, and your budget.
Smartphone Photography
Modern smartphones (iPhone 15+, Samsung Galaxy S24+, Google Pixel 8+) have cameras capable of producing good listing photos if you know what you’re doing. The wide-angle lens, HDR processing, and computational photography features can handle most interior and exterior shots. Smartphone photography makes sense for lower-priced listings where the commission doesn’t justify a $200+ photographer, rental properties and investment listings, quick social media content and “coming soon” teasers, and markets where professional photography isn’t the norm.
The key limitation is dynamic range — smartphones struggle with high-contrast scenes like a room with bright windows and dark corners. They also can’t match the resolution and lens quality of a DSLR for large prints or zoom-ins.
DSLR/Mirrorless Camera
If you plan to shoot your own listings regularly, investing in a camera like a Canon EOS R50, Sony a6400, or Nikon Z30 with a wide-angle lens (10-18mm or equivalent) will dramatically improve your results. DSLR quality makes sense if you list 10+ homes per year and want to control the photography process, your market expects high-quality photos, or you enjoy photography and want to add it to your skill set.
Professional Photographer
For most agents, hiring a professional real estate photographer is the best investment per dollar in your listing marketing budget. Professional photography is worth the cost for listings above your market’s median price, luxury or unique properties, properties where photography will make the biggest difference in perception, and any listing where you want to win more listings from future sellers who see your marketing. The cost typically ranges from $150-$400 depending on the size of the home and your market. For a complete listing marketing strategy, see our guide to winning more listings.
The Essential Shot List for Every Listing
Every listing needs a consistent set of photos that tells a complete visual story. Missing key shots leaves buyers with questions — and questions lead to skipped showings. Here’s your standard shot list.
Exterior Shots (4-6 Photos)
Front elevation: The hero shot. Capture the full front of the home, including the driveway and landscaping. Shoot from across the street or from the sidewalk to get the widest, most flattering angle. Time this shot for when the sun illuminates the front of the home — typically morning for east-facing homes, afternoon for west-facing.
Rear/backyard: Show the full backyard, patio, deck, or outdoor living space. If there’s a pool, fire pit, or outdoor kitchen, make sure it’s prominently featured. Shoot from a corner angle to show depth rather than straight-on.
Curb appeal details: Landscaping, front porch, entryway, garage. These shots help buyers imagine the experience of arriving home.
Neighborhood context: If the home backs to open space, a golf course, or has a mountain/water view, include a shot that shows this. Views sell homes.
Interior Shots (15-25 Photos)
Living areas: Shoot every living room, family room, and den from at least two angles. Stand in a corner and shoot diagonally across the room to maximize the sense of space. Include the windows to show natural light.
Kitchen: This is typically the most important interior shot. Capture the kitchen from the angle that shows the most counter space, the appliances, and any island or breakfast bar. Shoot a second angle that shows the relationship to the dining area. If the kitchen has been recently updated, include a detail shot of the countertops, backsplash, or fixtures.
Primary bedroom: Shoot from the doorway or a corner to show the full room. If there’s an en-suite bathroom, include a shot from the bedroom looking toward the bathroom entrance to show the layout.
Bathrooms: Photograph the primary bathroom from the angle that shows the most features — vanity, shower/tub, and fixtures. For secondary bathrooms, one well-composed shot is sufficient.
Additional bedrooms: One shot per bedroom, from the corner or doorway.
Special features: Home office, laundry room, mudroom, walk-in closets, bonus rooms, finished basement. Any room that adds value or differentiates the home deserves a photo.
Lighting: The Single Biggest Factor in Photo Quality
Lighting is what separates professional-looking photos from amateur snapshots. The goal is to make every room look bright, open, and inviting — even if the room is small or doesn’t get much natural light.
Natural Light Techniques
Shoot during golden hours. The best natural light for real estate photography is during the first two hours after sunrise or the last two hours before sunset. The light is warm, soft, and directional — perfect for making homes look inviting. Midday sun creates harsh shadows and blown-out windows.
Open every window covering. Before you start shooting, walk through the entire home and open every blind, curtain, and shade. Natural light flooding through windows is the single most effective way to make rooms look larger and more appealing.
Turn on every light. Even when shooting with natural light, turn on all lamps, overhead lights, and under-cabinet lighting. This fills shadows, adds warmth, and makes the home feel “lived in” in a positive way. Replace any burned-out bulbs before the shoot.
Avoid shooting into bright windows. When possible, position yourself so windows are to your side, not directly in front of you. Shooting into a bright window creates silhouettes and underexposes the room. If you must include a window in the shot, use your camera’s HDR mode to balance the interior and exterior exposure.
When Natural Light Isn’t Enough
Some rooms — interior bathrooms, basements, north-facing rooms — don’t get enough natural light for good photos. In these cases, use a bounce flash (an external flash pointed at the ceiling to create soft, indirect light) or a portable LED panel. Never use your camera’s built-in flash — it creates flat, harsh light with unflattering shadows.
Staging Basics: What to Do Before You Shoot
You don’t need to hire a professional stager for every listing, but you do need to prepare the home for photography. A 30-minute walkthrough before shooting can dramatically improve your photos.
Declutter every surface. Remove items from kitchen counters (except one or two decorative items), bathroom counters, nightstands, and coffee tables. Less is more. Clear refrigerator magnets, remove personal photos, and tidy bookshelves.
Make all beds. A made bed with matching pillows transforms a bedroom photo. If the bedding is dated or worn, bring a neutral comforter and pillow set specifically for photo day. This costs $50-80 and pays for itself on the first listing.
Close all toilet lids. Open toilets in listing photos are surprisingly common and always look bad.
Remove cars from the driveway. Photograph the exterior with a clear driveway. Cars distract from the home and make the driveway look smaller.
Hide trash cans, garden hoses, and pet items. Move trash bins, hoses, litter boxes, food bowls, and pet beds out of the frame. These are invisible to the homeowner but distracting to buyers.
Add simple touches. A fresh vase of flowers on the kitchen island, matching towels in the bathroom, a bowl of fruit on the counter — small styling details make rooms feel aspirational rather than lived-in. For seasonal staging tips, see our guide on preparing listings for maximum impact.
Composition Rules That Make Rooms Look Better
Professional photographers follow specific composition rules that make rooms look spacious, balanced, and inviting. Here are the most impactful rules you can apply immediately.
Shoot from hip height. Most amateur photographers shoot from eye height (5-6 feet). This creates a downward angle that makes rooms look smaller and distorts vertical lines. Instead, hold your camera at hip height (3-4 feet) or use a tripod set to counter height. This perspective shows more of the room and keeps vertical lines straight.
Use a wide-angle lens — but not too wide. A wide-angle lens (16-24mm on full-frame, 10-16mm on crop sensor) captures more of the room in a single shot. But going too wide distorts the edges and makes rooms look unrealistically large — which disappoints buyers during showings. The sweet spot is typically 16-20mm on full-frame or 10-14mm on crop sensor.
Shoot from corners. Position yourself in a corner of the room and shoot diagonally to the opposite corner. This maximizes the visible area and creates a natural sense of depth. Avoid shooting flat against a wall — it compresses the room.
Include three walls. The most pleasing interior photos typically show three walls, which gives viewers a sense of the room’s size and layout. Two walls feels flat; four walls usually requires a lens so wide that distortion becomes a problem.
Keep the horizon level. Tilted photos make rooms look unstable and unprofessional. Use a grid overlay on your phone or a bubble level on your tripod. If a photo is slightly tilted, straighten it in editing — this takes 5 seconds and makes a significant difference.
Photo Editing: Free and Paid Tools
Every listing photo should be edited before uploading. Editing doesn’t mean creating a false impression — it means making the photo look as close to what the room looks like in person on a bright day.
Essential Edits for Every Photo
Straighten any tilt. Correct the white balance (remove blue or yellow color casts). Brighten shadows to show detail in dark areas. Pull down highlights to recover detail in bright windows. Add a touch of clarity or sharpness. Crop to remove distracting elements at the edges.
Recommended Tools
Free: Snapseed (mobile), Google Photos editor, Apple Photos editor — all capable of the essential edits listed above. Snapseed’s “HDR Scape” and “Tune Image” tools are particularly effective for real estate photos.
Paid: Adobe Lightroom ($10/month) is the industry standard for batch editing. You can create presets that apply consistent corrections to every photo in seconds. Lightroom’s lens correction and perspective tools are particularly useful for real estate work.
AI-powered: Tools like Photoroom, PhotoAI, and BoxBrownie offer one-click enhancements specifically designed for real estate photos, including sky replacement, virtual staging, and automatic brightness correction.
Virtual Staging: When to Use It and When It Backfires
Virtual staging — digitally adding furniture and decor to photos of empty rooms — has become increasingly common and increasingly sophisticated. Done well, it helps buyers envision themselves in the space. Done poorly, it creates disappointment during showings.
When virtual staging works: Vacant properties that are difficult to visualize when empty, rooms with unusual layouts where furniture placement helps buyers understand the space, and investment properties where the cost of physical staging isn’t justified.
When it backfires: When the quality is poor and the furniture looks fake or out of scale, when the staging misrepresents the room size (placing a king bed in a room that can only fit a queen), and when buyers arrive at the showing expecting the furnished version. Always include both the staged and unstaged versions in your listing, and clearly label virtual staging as such. Many MLSs now require this disclosure.
Drone Photography and Video
Aerial photography can dramatically showcase properties with large lots, waterfront locations, scenic views, or proximity to amenities. But it’s not worth the cost for every listing.
When drone photography adds value: Properties on acreage or large lots, waterfront or golf course homes, homes with unique lot positions (cul-de-sac, backing to open space), and luxury listings where comprehensive marketing is expected.
When to skip it: Condos and townhomes, properties in dense subdivisions where the aerial view isn’t distinctive, and lower-priced listings where the cost doesn’t justify the return.
Legal requirements: Commercial drone photography requires FAA Part 107 certification. If you’re using a drone for business purposes, you or your photographer must hold this certification. Flying without it can result in fines and, more importantly, liability issues if there’s an incident. Most professional real estate photographers who offer drone services already have their Part 107.
Hiring a Professional Photographer: What to Look For
If you decide to hire a professional, here’s how to find the right one and get the best results.
Look for real estate specialization. Wedding photographers, portrait photographers, and general photographers don’t automatically shoot good real estate photos. Look for a photographer whose portfolio is primarily residential real estate. They’ll understand composition for rooms, lighting for interiors, and the shot list your MLS requires.
Review their MLS work, not just their website. Photographers put their best work on their website. Ask for a link to recent listings they’ve shot and look at the full set of photos as they appear on the MLS. That’s the real indicator of what you’ll get.
Agree on deliverables before the shoot. Specify the minimum number of photos (typically 25-40 for a standard home), the turnaround time (24-48 hours is standard), the delivery format (high-resolution JPEG, MLS-ready sizing), and whether twilight, drone, or video is included or extra.
Expect to pay $150-$400 for a standard residential shoot (under 3,000 sqft) in most markets. Twilight shoots, drone photography, and video tours are typically add-ons. Luxury photographers may charge $500+. If a photographer costs significantly less than the market rate, their work probably reflects the price.
Photo Order and MLS Optimization
The order of your photos matters almost as much as their quality. Most MLS systems display the first photo as the cover image in search results, and many buyers only look at the first 5-10 photos before deciding whether to schedule a showing.
Photo 1: Front exterior (hero shot) — this is your cover image. Make it count.
Photos 2-3: Kitchen — the most important interior room for most buyers.
Photos 4-5: Living areas — show the main living spaces and any open-concept layout.
Photos 6-7: Primary bedroom and bathroom — the private retreat.
Photos 8-12: Additional bedrooms, bathrooms, and special features.
Photos 13-15: Backyard, outdoor living, and rear exterior.
Remaining photos: Details, views, neighborhood, and additional angles.
Avoid leading with the backyard (buyers want to see the front first), interior detail shots (they need context), or non-representative angles that don’t show the home’s best features.
Common Photography Mistakes to Avoid
Shooting with the flash on. Built-in flash creates harsh, flat lighting. Turn it off and use natural light or external lighting instead.
Including yourself in mirror reflections. Check every mirror and reflective surface in the frame. Your phone or camera in a bathroom mirror is an amateur mistake that’s easy to avoid.
Photographing the toilet with the seat up. It happens more often than you’d think. Close every toilet lid before shooting.
Using portrait orientation. MLS systems and listing websites are designed for landscape (horizontal) photos. Portrait photos display with large black bars on either side and look unprofessional.
Over-editing. HDR processing that makes rooms look like video game environments, over-saturated skies, and heavy vignettes all hurt credibility. The goal is natural-looking, bright, and clean — not artificial.
Too few photos. Listings with fewer than 15 photos get significantly less engagement. Cover every room and feature. More photos (up to 40) generally means more showings.
Great listing photography is one of the highest-ROI activities in your business. If you’re looking for a platform that helps you organize and distribute your listing marketing — from photos to social posts to email campaigns — CloseDaily integrates your listing marketing into your overall CRM and lead management workflow.
Keep Reading

Real Estate Follow-Up: The Complete System for Converting Leads to Clients
Build a follow-up system that converts more leads into clients. Covers speed-to-lead response, multi-channel cadences by lead source,...

Real Estate Negotiation Strategies: How Top Agents Win Better Deals
Master the negotiation tactics that top agents use to win better deals. Covers positions vs. interests, buyer-side and...

How to Build a Real Estate Marketing Plan That Actually Generates Leads
Build a real estate marketing plan that generates leads consistently. Covers target audience, budget allocation, the four marketing...